Hey everyone, Dani here again. It is official; we have passed the 60% mark on our Kickstarter campaign!! Kck.st
Thanks so much for all of the support in getting this far! We still have a bit to go though, so please keep spreading the word and we can make it! :)
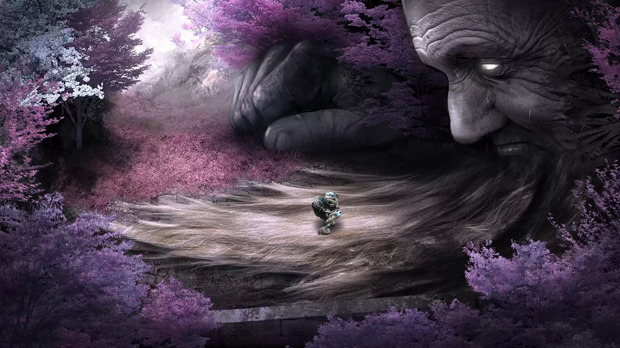
Anyhow, for this update I want to give everyone a bit of insight into the art side of the game. Since I handle all of the artwork and writing, it is the perfect subject for me to cover.
---Before we start, keep in mind that everything you see are from various stages of development, and likely will be fairly different in the final version.---
So, for this update let’s talk about the maps!
These all began as a series of large over-world sketches to test ideas and generally brainstorm. Basically I was trying to get a feeling for the overall shape of the world, major features, and the pallet shifts needed to keep the game a bit more interesting. In the end, it came down to 4 main sections; forest (green), ruins (red), water (blue), and darkness (black)... of course, with variation within these areas.
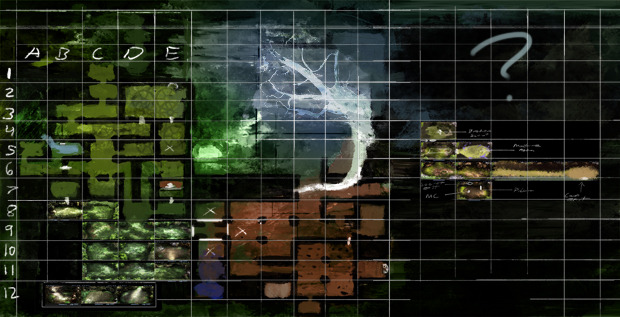
Outside of these over-world sections are also a range of hidden areas and “dungeons”, but this first map gives us the solid foundation to branch from.
From there, I take the maps and refine them a bit, thinking through exactly what needs to start happening within the maps to give them a bit more life.
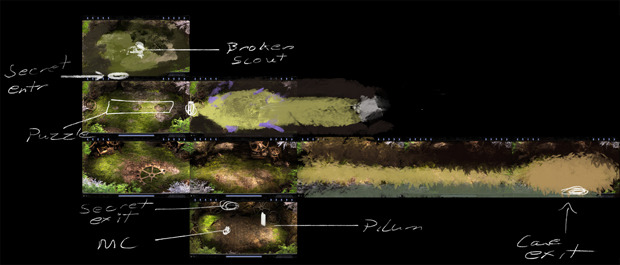
Let’s take the starting area in the demo as an example.
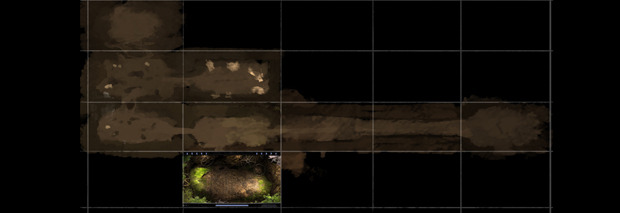
I make notes on the maps as I go, and update or switch around sections to make more sense. Then I begin to start building the maps one by one (using a combination of 3d sculpting, matte painting, and just straight brushes).
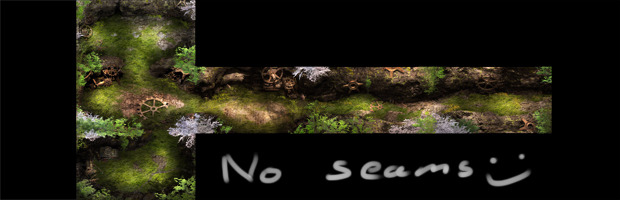
After that, it is time to seam them. Since each map is made individually, they don’t exactly match along their boarders. This means I have to take them all into a large file and start to clone out the edges between the maps to remove the visible breaks (on each of the layers that the map needs for the final; usually tree-tops and grounds.)
Then, each one of the maps is taken out into their own files, and exported as their layers for us to use in the game (after running them through a bit of optimization). Of course, we also export out the light layers and other effects that go on top, along with a tiny thumb image used to project down as a faked lighting effect (which is why the character gets lighter or darker if they are in a lighter or darker part of the map).
:: Note - Did you know if you press M in the alpha, you can see how the maps are set up? Including where you are, and where you have been?
The last step is extracting out parts of the map that need animation (so the switches for the puzzle, or the door). Which we then run through our converter and packer tools James made to import back into the game.
Overall, the process is a bit involved, but really gives me the most freedom to explore artistically and focus on just delivering a certain feeling or experience.
Hopefully you enjoyed this deeper look into how I work and how Bloom gets made. Next I’ll chat about how I approach the character and creature design (with the process behind that, which is even more involved :|
Anyhow, as always, let me know what you think and thanks again so much for the support. :)


Backing, and looking good.
Nice work.