Here is some information regarding the game's interface in order to help you get to grips with it.
Index:
- 1. Hotbar
- 2. The Chat View Box
- 3. The Chat Input Box
- 4. The Game Screen
- 5. Status Bars
- 6. Gold and Ping
- 7. Panel Buttons
- 8. Panels
- 9. Chat Channels
- 10. The Toolbar
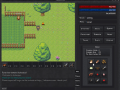
This is the client window, the main interface. To see the uses and effects of various parts of the interface, use the numbers and corresponding explanations to help you to understand the game's interface.
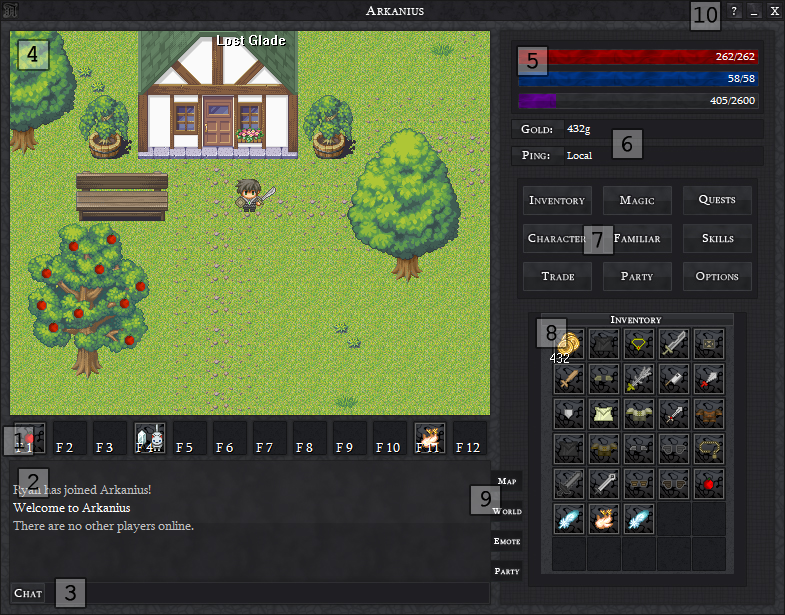

This is the hotbar, you can drag items and spells and drop them onto the hotbar in order to quickly access the spells or items you wish to put on there. In the picture (see above) there is an Apple, a Summon Cat spell and a Raw Chicken on the hotbar. Pressing F1 on the keyboard would eat the apple, pressing F4 would cast the summon cat spell and pressing F11 would use the Raw Chicken (which wouldn't do much seeing as the player isn't standing anywhere suitable to cook it). You may also use the mouse by left-clicking an item or spell on the hotbar to use the item or spell, or right-click to remove it from the hotbar.
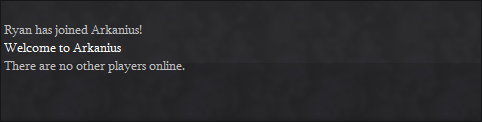
In the chat view box you can see messages from the server; for instance messages telling you that you've received an item or have x amount of trees left to cut, etc and also things such as the welcome message and the online players message in the picture above. It also shows you things other players on the same map, in the world, emote messages (such as Ryan poked the bench) and party messages between you and your friends. For more information on how to use the Map, World, Emote and Party channels see '9'.

This is where you can type messages to other players. A few things to remember about this inpux box is you can't use W, A, S and D to move when your writing or the input box is in focus (i.e the cursor is there). Also when the input box is NOT in focus if you hit the SHIFT key it will empty the input box (useful for when you accidentally press keys whilst playing the game, saving the effort of clearing the box manually). Also if a Channel is selected the input box will send the written message to that channel, use ENTER to send a message. For more information on how to use the Map, World, Emote and Party channels see '9'.
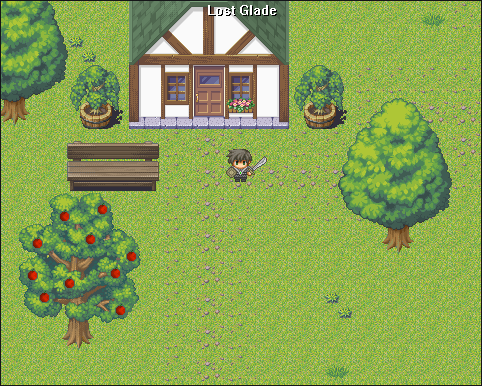
This is where you view the game, literally the game's screen. You can see other players, the environment, npcs (non-player characters, such as a sheep) buildings and such. Shop, Bank, Trade and other windows will also be displayed here.
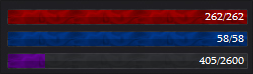
The Red (first, top) Bar displays the player's HP (Health Points), this is your life, when the value or bar (the bar represents the value) you die. So be sure to have plenty of food and/or potions with you in order to prevent death (when you die you lose one random item).
The Blue (second, middle) Bar displays the player's MP (Magic Points), this is what you use to cast spells (spells cost MP for instance; the Summon Cat spell in the Hotbar costs 25MP), this slowly regenerates over time (so does your HP!), although, you can also restore it with specific items and potions.
The Purple (third, bottom) Bar displays the player's EXP (Experience Points), this is how experienced your character is, the more experience you get the better, you get experience from completing quests, killing monsters and other ways. When the bar is full (405/2600 becomes 2600/2600) you go up a level, when you go up a level you may make your character stronger. the first number 405/2600 is the amount of experience you have and the second number 405/2600 is the amount of experience you need before you level up. This sums up the three status bars.
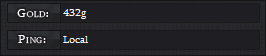
The 'Gold:' box shows how much gold the player has, in this case the player has 432g (432 Gold)
The 'Ping:' box shows the ping time (in milliseconds) which is the amount of time it takes for the server to talk to the client, in this case it says local, seeing as the server and client talk to each other via my local network, basically they're on the same computer, so it doesn't take long.
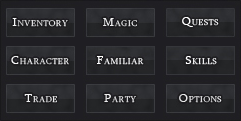
These are very simple to use, the 'Inventory' button switches to the Inventory Panel, which you can currently see in the picture at the top of this post, the 'Magic' button switches to the Magic Panel, the 'Quest' Button switches to the Quest Panel, so on and so forth. For more information regarding the panels see below.
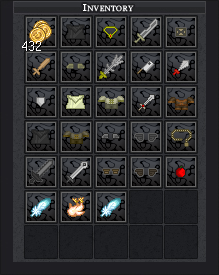
This displays the currently open panel, in this case (in the picture at the top of this post) the Inventory Panel is open, where the player can browse, use (double-click) and drop (right-click) their items. Here is some information regarding the other panels:
8i. Inventory Panel:
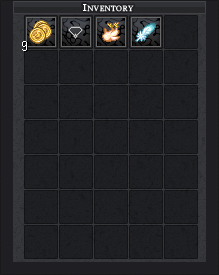
Here the player can browse, use (double-click) and drop (right-click) their items. You may also drag items from here to your Hotbar.
8ii. Magic Panel:
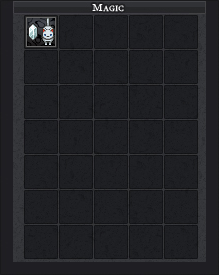
Here the player can cast spells (double-click) or forget spells (right-click). You may also drag items from here to your Hotbar.
8iii. Quest Panel:
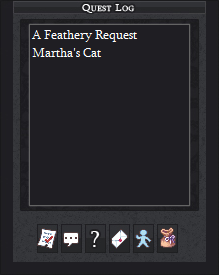
Here the player can view the selected quest's Actual Task (The note), Last Speech (The speech bubble; Last thing the quest giving npc (non-player character) said, Quest Status (The question mark; You can cancel quests here), Main Task (The letter), Quest Requirements (The person) and Rewards (The bag), by clicking the corresponding buttons below the listed quests.
8iv. Character Panel:
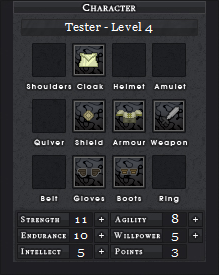
Here the player can un-equip (take off) worn items, see their stats and improve their stats using the stat points gained from leveling up (you get 3 points per level-up), you can increase your stats using these points. The stats are Strength (makes you do more damage and parry (block) more often), Endurance (adds to your maximum HP (Health Points)), Intellect (Adds to your maximum MP (Magic Points)), Agility (Makes your armour rating, dodge rate and critical hit (random extra powerful attacks) rating higher (happens more often)) and Willpower (makes your HP and MP regenerate (restore) faster).
8v. Familiar Panel:
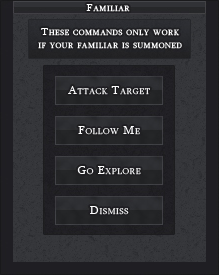
Here the player can get their Familiar (An animal, monster or other npc which is summoned by casting the corresponding summon x spell) to Attack Target (makes the familiar attack the targeted npc; npcs can be targeted by clicking them on the game screen), to Follow Me (makes the familiar follow you, quite self explanatory), Go Explore (makes the familiar wander around aimlessly and explore the land) and Dismiss (dismisses the familiar which makes it disappear, don't worry you can re-summon the familiar providing you have enough MP).
8vi. Skills Panel:
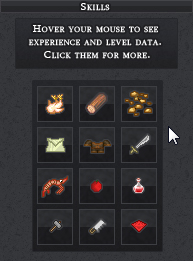
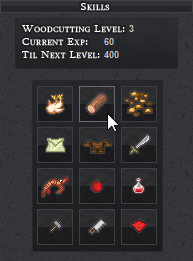
This is the skills panel. A player can check their current level, current experience and remaining experience in their chosen skill. There are 12 skills: Cooking, Woodcutting, Mining, Tailoring, Leatherworking, Blacksmithing, Fishing, harvesting, Alchemy, Crafting, Carpentry and Enchanting. To see the level, current experience and experience remaining hover your mouse over teh chosen skill's icon as seen above.
8vii. Trade:
This is not a panel, it is a function that you click to trade with the targeted player, therefore there is no need for an explanation on a panel, as there isn't one, the trade function will be explained somewhere else and relevant.
8viii. Party:

Here the player can invite the targeted player to their party (a private group of players, usually used when players decide to train, explore and adventure with each other), or the player can leave their existing party by clicking the 'Leave' button. Here There is no party, however if the player is in a party they can see other party member's HP, MP, EXP and name.
8ix. Options:
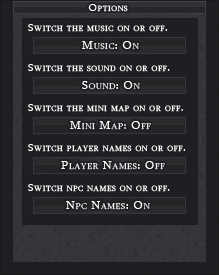
Here the player can change their personal game options such as the game's music (turns the music on or off), the game's sound effect (turns the sound effects on or off), the mini-map (turns the mini-map on or off), player names (turns the names of players which are shown above their characters heads on or off), npc names (turns the names of npcs which are once again shown above their heads on or off).
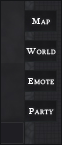
There are four chat channels: Map, World, Emote and Party. When in the Map Channel (click the map tab to enter the channel) all messages sent will be sent to the people in the same area/map as you, when in the World Channel everyone logged into the game will receive your messages, when in the Emote Channel all messages you type will be shown as, for example: "John kicked the ball" instead of like a normal channel which would show: "John: Kicked the ball". What the emote channel does is it removes the colon and lets you type in an action to present to the other players around you. If you wanted to do that action all you would type (providing your in the Emote Channel) is "kicked the ball" and when in the Party Channel, people in the same party as you receive your messages.

You can click and hold the toolbar to drag the game client around your computer's screen, use the '_ Button' to minimize the client to your taskbar, use the 'X Button' to exit the game to the main menu of the client (where the login, register, etc are) and use the '? Button' to open up the games in-game guide, which is an in-game help and guide system explaining how to play the game, controls, explanations on panels, quests and other helpful services.
This is the end of the Game Interface guide, there will be much more added to it in the near and far future and I also hope you benefited from reading it