So for starters i (Martin Kupski) am an artist at heart so most of the stuff is aimed for the artists who are trying to start off with doing some hand painted stuff and rigging. If there are any questions or if you would want a more in depth tutorial on any part of this please leave a comment below or mail us. I would be more than happy to explain =)
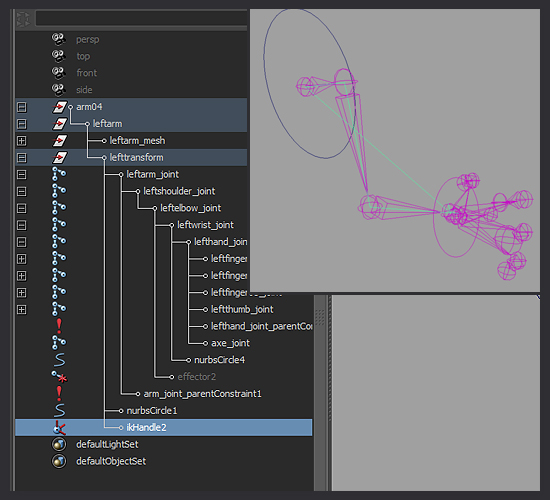
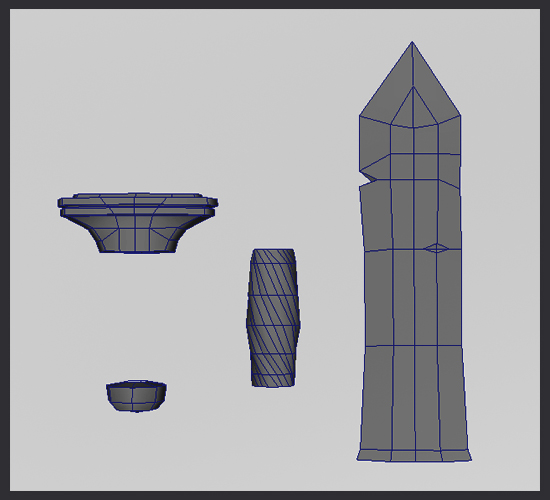
OK! now what we start off with is a already finished arm that i used on the double handed axe asset, took that one and going to use this as a reference for my sword im going to make!
The rig for you who want to know is very basic its built up by quite few joints because its based on hinges and rotation axies. i added some small controlers for shoulder and wrist. There is an IK handle connected from the shoulder to the joint before the wrist just to make the arm movements more easy to animate and then the wrist by itself because you want to have the fine control of the hand seperate.

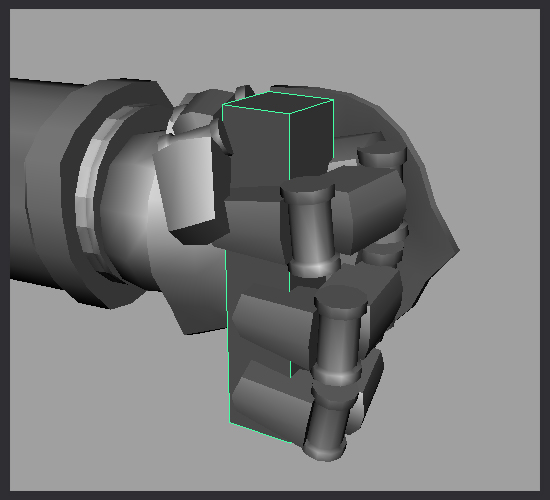
There is one seperate joint that is in the middle of the palm where i constrain the sword to it.
One last thing on the rig that is very important for programming and that is naming your stuff. Because we are exporting FBX wich has a lot of information it can be a hassle to sort out what joint goes to what mesh, also we are using modular parts for building our mechs which makes it even more complex.
so what we did is made a standard on what to call each mesh/joint. For example we have Leftarm_joint and easy enough the mesh group that is constrained is called Leftarm_mesh.
takes a bit more time to do it but worth it in the end..
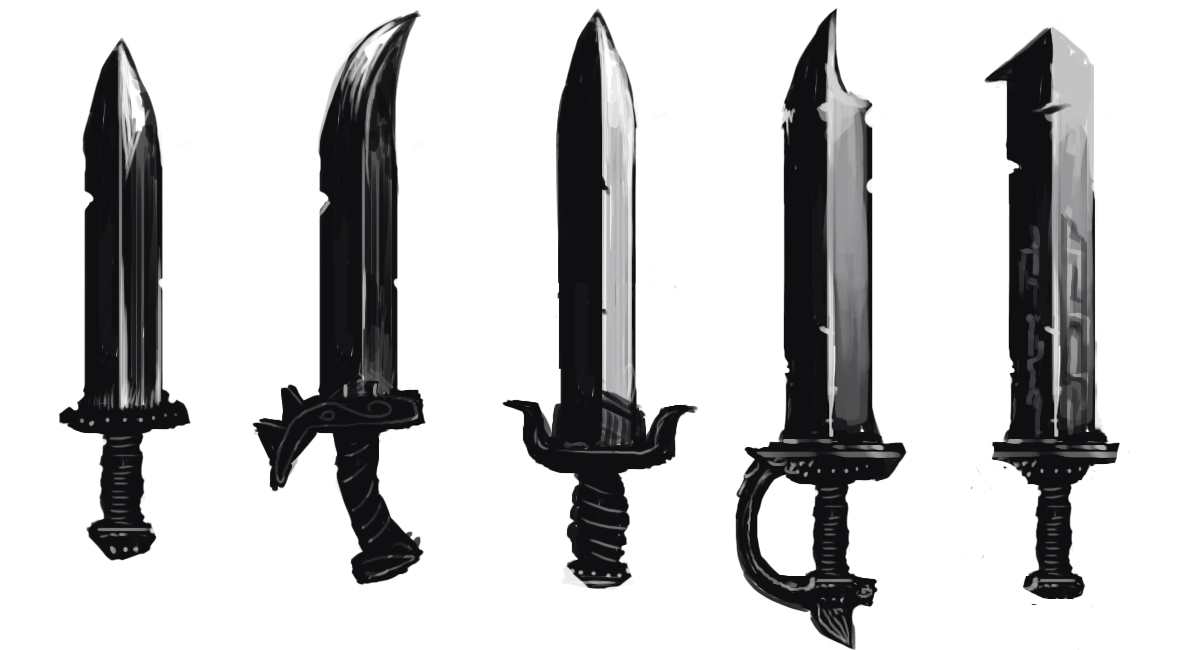
Note that this asset is small and easy to do if you have some reference. I prefere pinterest and just searching for sword gives you plenty of inspiration.
next i sat down and doodled a bit. Sketching helps to get the ideas out and lets ju ventilate all those ideas into concrete visual reference. This i use as a guide to create the shape i want and details are often lost in that process so just do these sketches quickly. (don't want to waste that precious spare time)
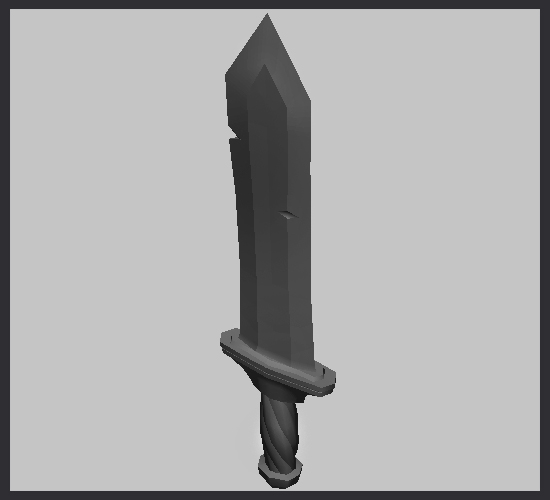
I build the sword in pieces starting with the handle and working my way up, everyone have their own way of working but i found this to be quick and easy. The model doesn't need to be super detailed because we are relying on detailed textures where we fill in small stuff into it there instead of making dense typology.
We also opted out of doing Normal maps because of the extra hassle and the visual style doesn't need it that much. (maybe if we were more than one artist doing everything, then maybe)
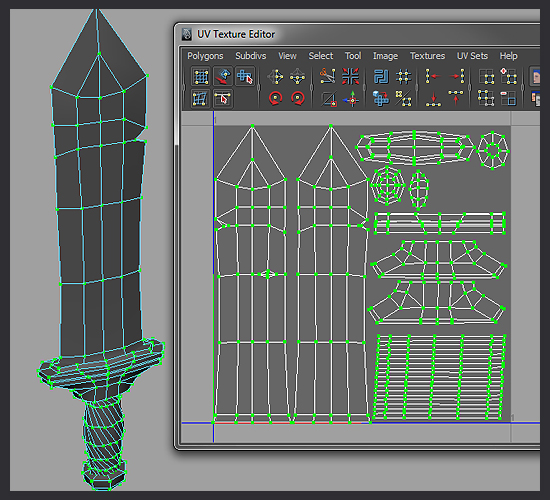
Here is the uv, Its not perfect but works and notice the small spaces left in it, that is there if i want to do a different version of the same swords but with added detail or just making it stand out from the standard sword.
Now this is where the fun part starts!..
Everyone work in different ways and im not saying mine is the optimal but i have this process nailed now and will keep it going because it looks okey for our game.
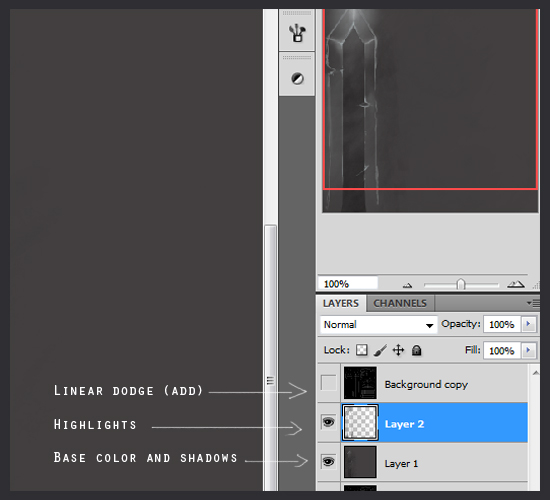
I work usually in three layers (except for special cases) where i do a base layer with base coloring and a highlight layer where i do all the "shading" stuff to the texture. Then i have a shadow layer underneath it but in this case i just used the shadow and basecolor together in one. Then i have the uv ontop.
The process is very easy.
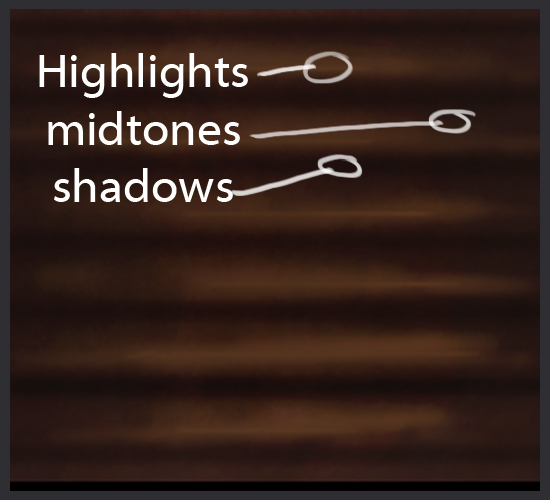
Apply base color, apply shadows, tweak midtones and then finish off with some highlights.
After that depending on what the object is add scratches and dirt. I find the soft and sharp round brush to be the best to work with but i also use some custom dirt brushes to break stuff up a little.
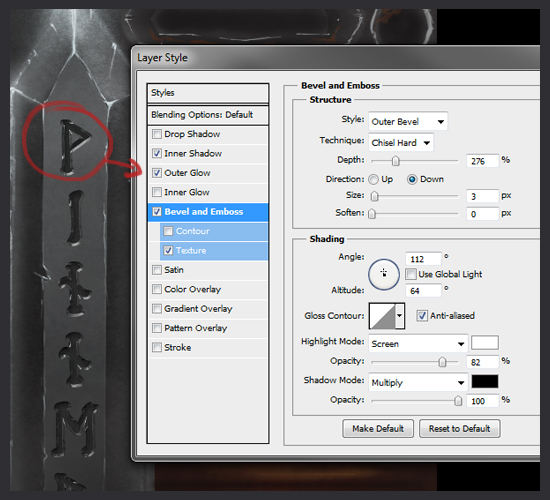
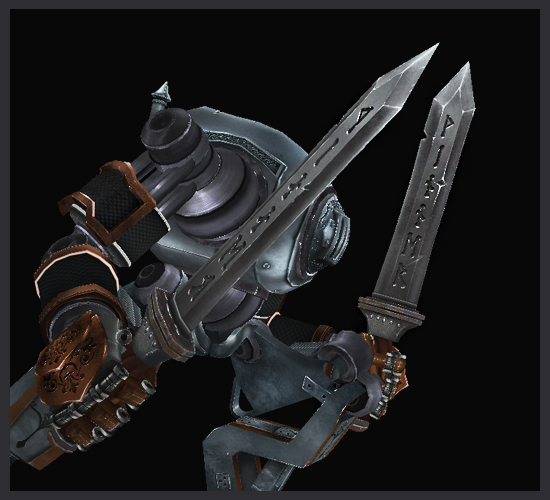
Also on this sword i wanted to use some runes to give it a bit more Northern feel and that is just a font with some minor tweaks to the layer style in photoshop.
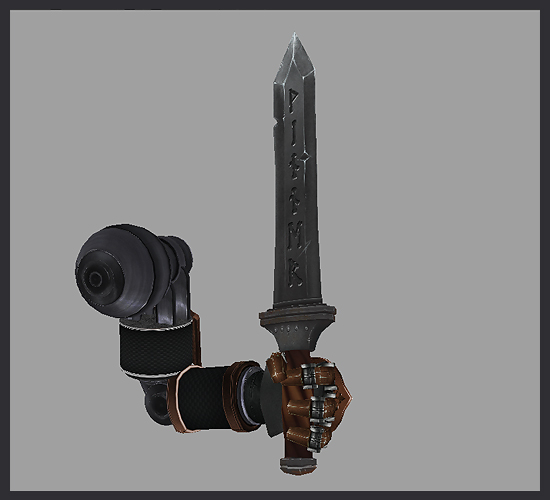
after that i add all the last touches and save the texture. check it so the model works with it and apply the sword to the rig and voila a new asset. this process took me about 6 hours to complete.
Thanks for reading this and hope you get something out of it. As i said before; if you have any questions or suggestions on how to do this better then dont hesitate to comment below or mail me! Thanks again and hope you are as excited for Acaratus as i am, bye!


The skin looks great on the model!
thanks! We are trying to keep it simple graphics wise.
How are the runes mirrored on the left sword when you have both sides unwrapped? looking good, but a bit too grey and same everywhere.
they are not mirrored. we are making both sides unique because we don't want the same marks and scratches on both sides. its grey now but its only diffuse. the screens aren't from the engine
On the left sword the runes point the other way than on the other. You either have flipped UVs on one of the islands or I don't understand this.
Also, it looks the same from both sides now, so why waste half the UV space?
no its not the uv thats flipped, its because we are using the same arm for the other side and that arm is flipped. I will probably use the other uv spot for the flipped one, thanks for noticing it =)