simHello Folks, Im Eric K.,
Graphic Designer of Survivor - Forgotten World
and I show you a bit about "Drybrushing" and "fake ambient occlusion" in Texturing 3D models
and in 2D / Interface or general Art.
First: What is drybrushing ?
Drybrushing is a term out of non-digital painting, and Its mainly used to paint Sculpures or Figurines, and often used in Tabletop-Painting, like Warhammer or LOTR from Gamesworkshop.
You basically take your brush, take a light colour, try getting most of the pigment from the brush
so it is basically dry, and then you roughly wipe over the edges of your model.
So the flat surface will not get any pigment, but the standing out edges and reliefs will.
This is basically it.
Quite a difference for that nothing on the "model" itself changed or the colour/texture of the object itself. This technique is used a lot on fantasy game models.
The accented edges make the shape of a model stand out, and it is easier to recognize aswell, especially from far away.
The difference is, that we work Digitally. So we paint those highlights ourselves, and we have more options to control them, but its also harder to do, just brushing over is not possible here.
Drybrushing in Texturing:
Drybrushing is incredible powerful and can and often should be used on almost every possible model. If it does not look right, then its too strong, you can use it on everything if you do it subtle. Its always an improvement, unless you have a very specific art style (Tron p.ex.)
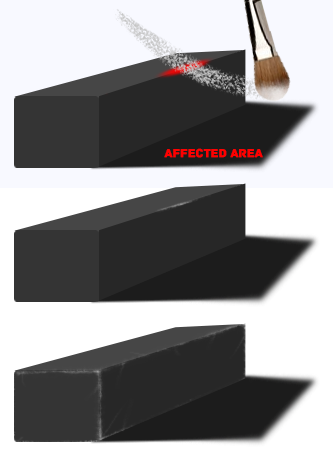
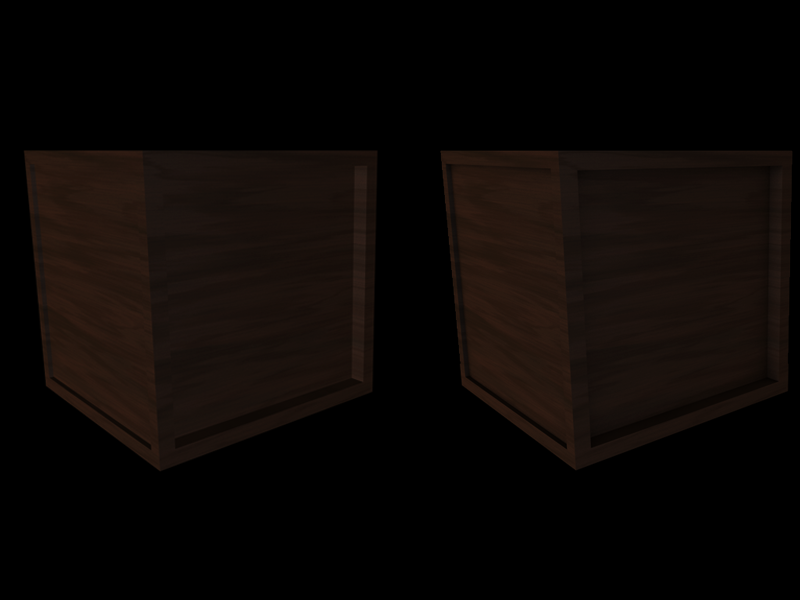
This is a wooden crate model. The texture is bad and it looks awful.
We are not going to change the texture here, we just apply some highlightsat the edges.
Thats quite a difference. The same bad texture, and we just accented the edges.
Why does it look so much better ?
Because there are no such hard polygonal edges in real life, and drybrushing gives the
softer-edges look back a bit, and shape in perspektive is easier to see and identify, which
gives a better sense of depth.
Now I first show you the fake Ambient occlusion painting or just shadow painting
and what it does on the model, and then I explain how to do these things in photoshop.
What is ambient occlusion ?
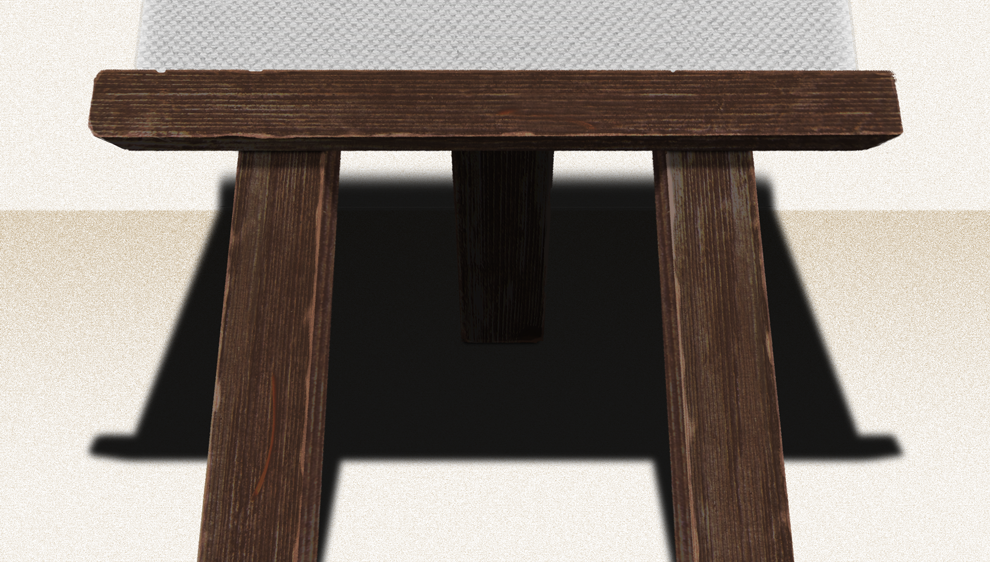
Ambient occlusion gives more realistic transitions between forms while creating soft shadowing between the edges of transition. While drybrushing is used on the edges looking towards outside,
the ambient occlusion effect is always in the inner corner.
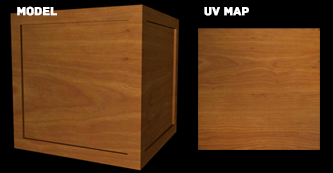
Here is a box to show the real Ambient occlusion.
The Ambient occlusion effect needs a lot of performance and not every engine or game supports it, but you can either bake it down on your model from your 3D program or paint it yourself.Usually you just want to bake it down since it requires no effort at all, but often you want to
have a similar or stronger effect with maybe another colour or inform of dirt on the spots whereAO usually would apply (and in some cases the 3D program dosnt draw it where you would want)So its essential you understand how it works.
AO is actually no shadow, its missing ambient light, but thats just playing with definitions :)
Again, a really big difference in realism.
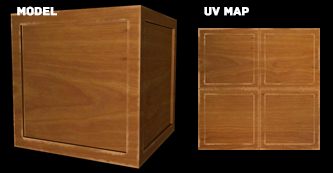
And we can paint this manually aswell.
Here our box with the "fake" painted ambient occlusion / shadows:
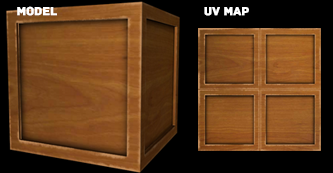
This gives so much more depth to the surface, with such simple methods.
Compare it with the box without the painted shadows.
How do i do that ?
Both techniques are rather easy, but you still need to be careful, to not apply them too much
or even unnoticeable. But less is often more.
You can either just paint them in your 3D program if it features such options, or go the classical way, the Photoshop way.
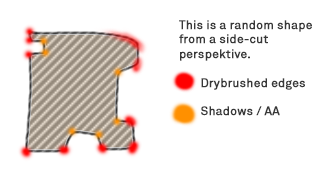
For the drybrushing, you need to use the right brush and paint, delete, paint, delete until its right.
If you are familiar with photoshop, you already know all the things needed, but for the others, here
is a

Here are some Ui Frames I did for the Interface of S-FW
Notice how the drybrushing works on 2D elements aswell. Drybrushing gives a shape, the wood plank wouldnt look good at all without it.
And drybrushing looks best on metal, since metal usually has a lot of rough highlighted edges.
Here an example I photographed:
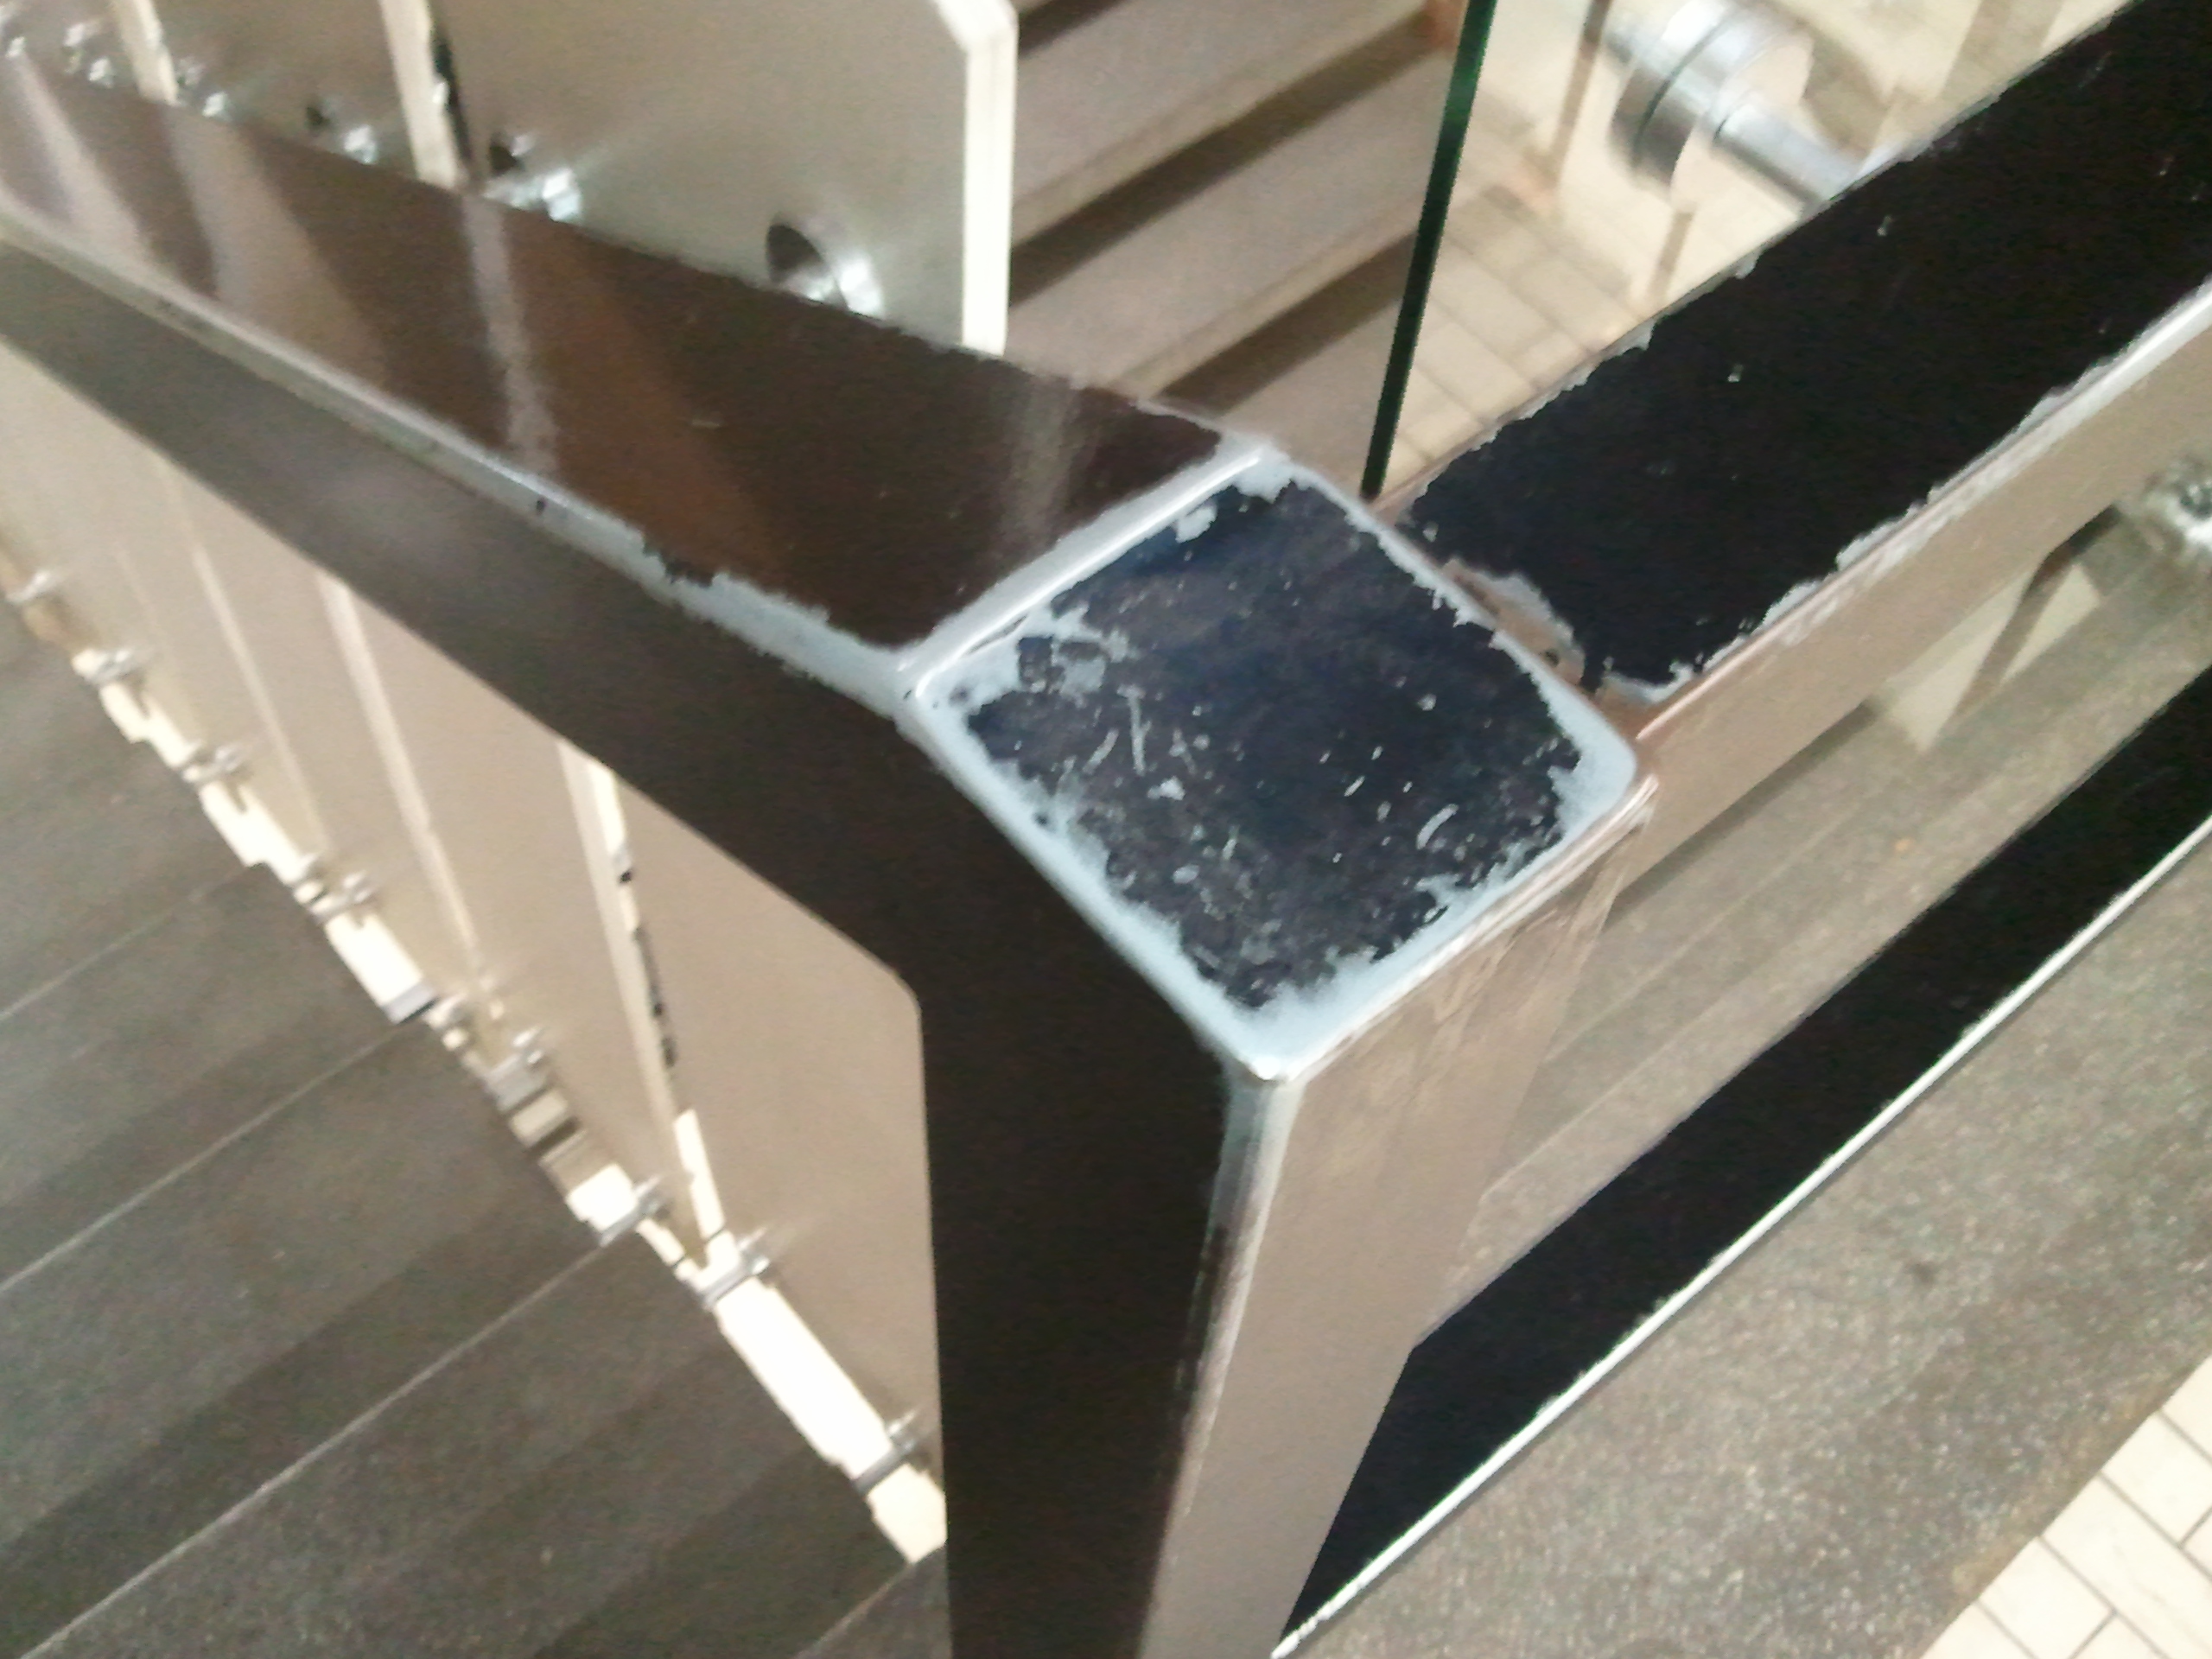
Note that it is not subtle at all here. It took a lot of damage over time.
But Its a pretty extreme case.
Make the effect very strong if you want it to look grungy and worn out,
but use it only subtle for normal models. You can use it on basically every material to get accents.
Here is another example of it in 2D use. See how the lines on the sides of the wood give it realism. There is also a very tiny painted AA unter the horizontal plank, and also a shadow.
And here is a good example of it in use in texturing. Imagine how it would look without
the white accents. (Its a weapon for bird-perspektive for Torchlight, copyright @ SamuelJ Wilson)

Thanks for looking into, and I hope I helped you on your journey in Game Design or Arts.
Also, check out our game: Indiedb.com : )