Hey IndieDB,
today I just wanted to showcase how I've implemented Portal-style... errr... portals in my little Unreal project (spoiler: it's surprisingly easy).
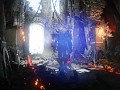
For those unfamiliar with Valve's game, portals allow you to see other parts of the level through a "portal plane", which can be traversed to teleport you to a new place in the level.
Something like this:
The idea is to composite the actual scene with a rendered view of the "other scene". Essentially something like this, if the outside environment was somewhere entirely different and not actually outside of the room:
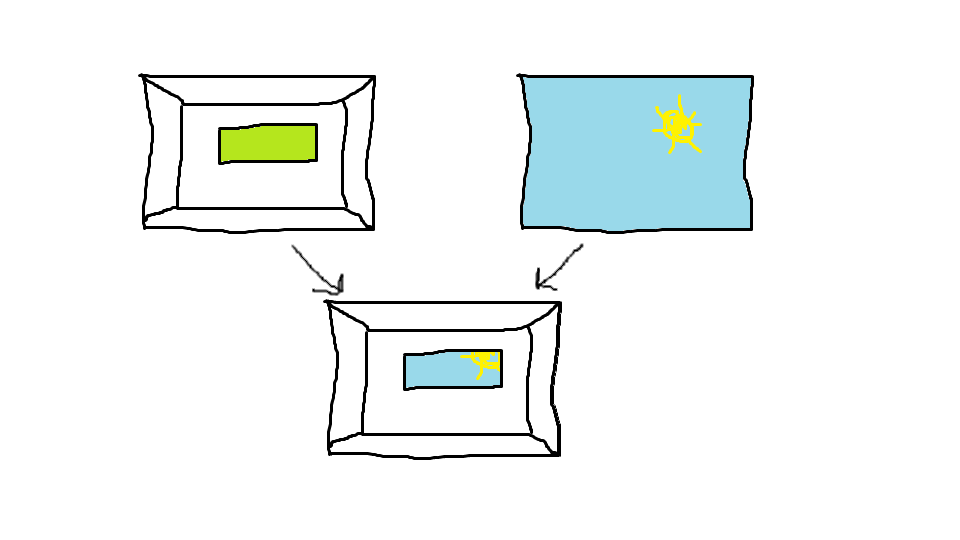
There are 4 key elements in order to achieve this:
The "portal mask" (the green rectangle / window in the top left image that will be cut out from the scene)
The scene capture / render target (where the "other scene" - the one seen through the portal - is rendered)
The post process material which will composite the two together.
The portal logic.
The Portal Mask
In order to tell which part of the image is the actual scene, and which part of the image is the portal into the "other scene", I use Unreal's Custom Depth buffer. This is as easy as changing the plane mesh's rendering settings:
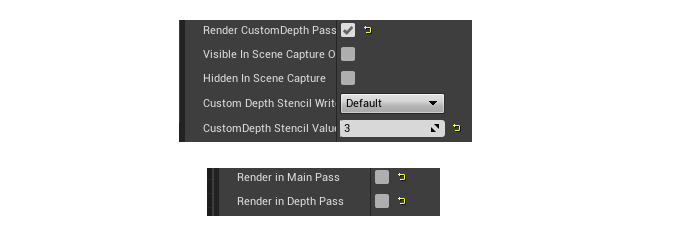
Now the portal plane will only be rendered in the Custom Depth buffer (with a Stencil Value of 3, this is important later on in the post process material).
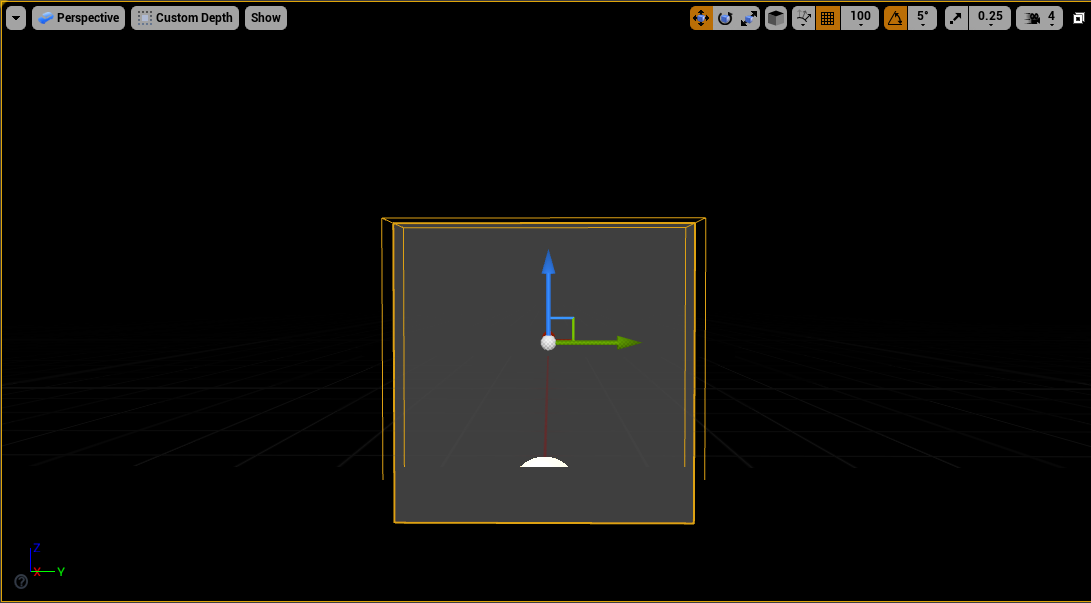
If I look at the Scene Depth buffer of my little test scene, it looks like this:
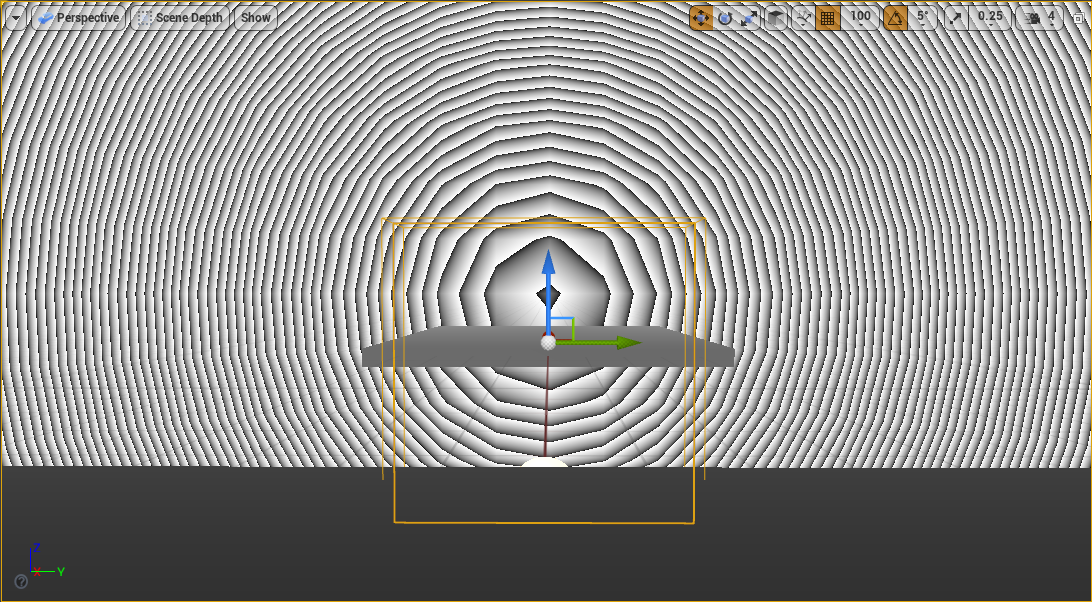
You can see the yellow wireframe outline of the portal, but it's not rendering anything in the Scene Depth buffer.
Conversely if I look at my Custom Depth buffer, it looks like this:
In this buffer, nothing *but* the portal plane is being rendered.
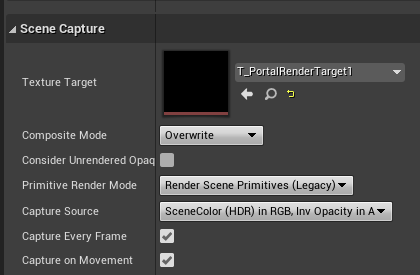
The Scene Capture / Render Target
Unreal provides a very handy component called "Scene Capture" which will conveniently render a scene into the render target you point it to. Once that's setup, all that's left to do is position the Scene Capture in the "other scene".
The Post Process material
This is where the compositing happens. Now I have my scene on one hand, and my "other scene" in a render target on the other, and I want to merge both so that the "other scene" is only visible through the portal.
To do this I wrote a post process material that checks whether the current pixel is part of the portal surface and renders from the appropriate source accordingly.
My first step is to subtract the Scene Depth value from the Custom Depth value:
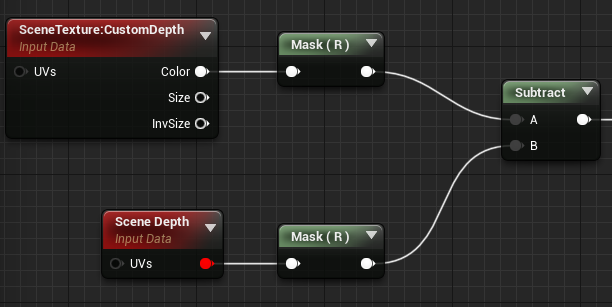
This will be used to determine whether the current pixel is part of the portal or not.
But how?
Well, consider the following crude drawing:
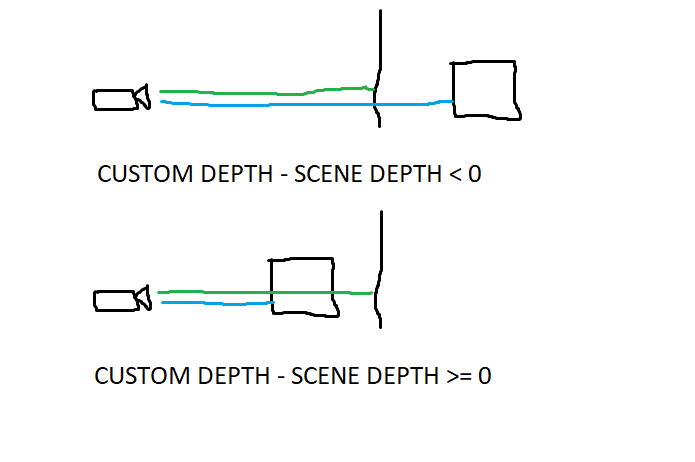
As I mentioned above, the portal plane (that vertical line) only renders in the Custom Depth buffer, while the actual scene (the cube) renders in the Scene Depth buffer.
By comparing the Custom Depth value (green) to the Scene Depth value (blue) I can tell if I'm rendering part of the scene (the difference is >= 0) or part of the portal (the difference is < 0).
And that's exactly what I do in my next step:
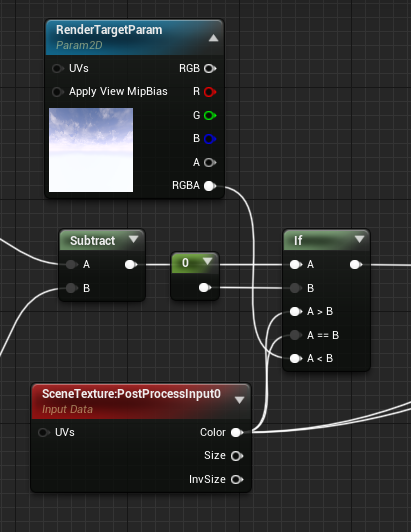
Here I tell the material to use the pixel from the render target containing our "other scene" if I am rendering the portal (difference < 0).
Otherwise I just render whatever is in the actual scene (PostProcessInput).
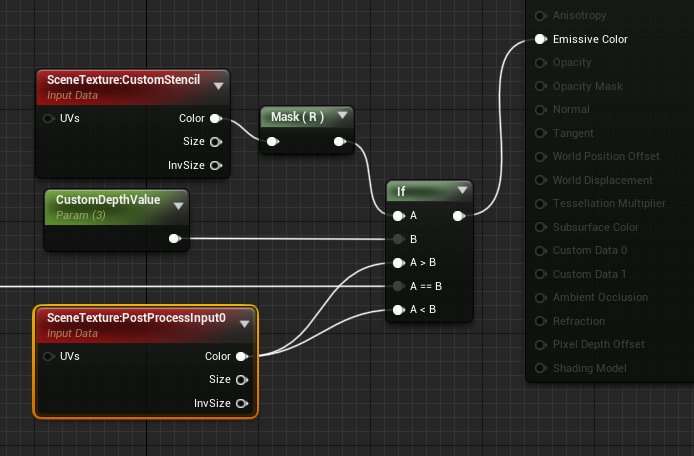
Now there is just one last step left. Remember how I mentioned above that I've set the Custom Depth Stencil Value of the portal plane to 3?
This is because I'm also using the Custom Depth buffer for other effects, and I don't want the "other scene" to be rendered on top of those!
So my last step is to check whether I'm actually drawing a pixel with a Custom Depth Stencil value of 3 (my portal) or something else (my other effects):
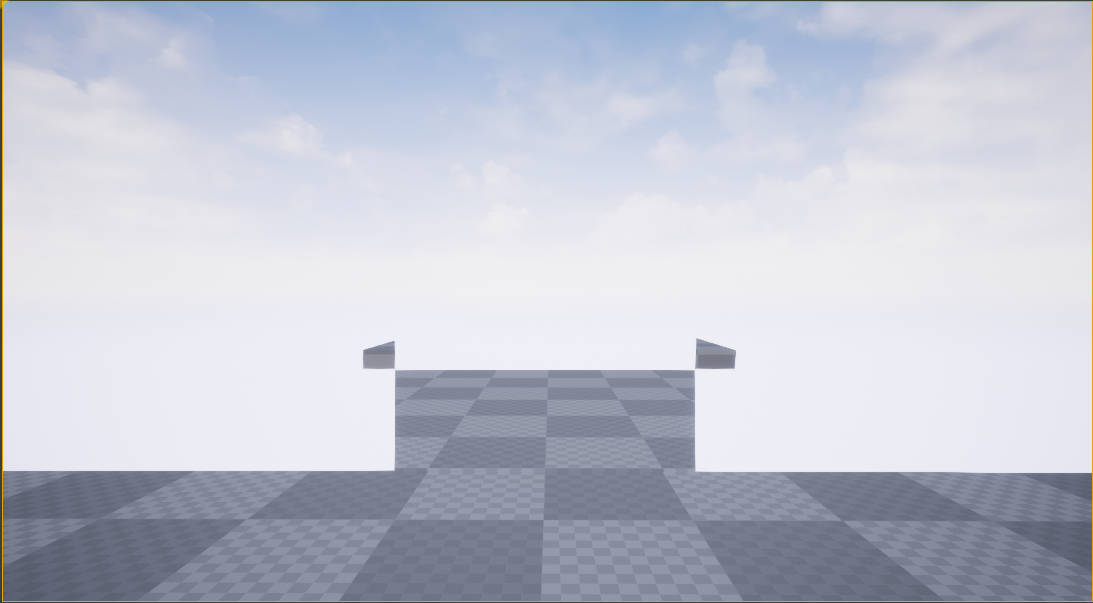
And the final result is a scene where my "portal plane" shows me a different part of the level:
The Portal logic
Of course if I stopped here, I would just have a flat plane showing a different part of the level, kind of like a security camera.
In order to work like a portal, it needs a bit of logic to make sure that the scene capture is constantly positioned (with respect to the capture's pivot / teleport location) in the same way that the player is positioned with respect to the portal plane:
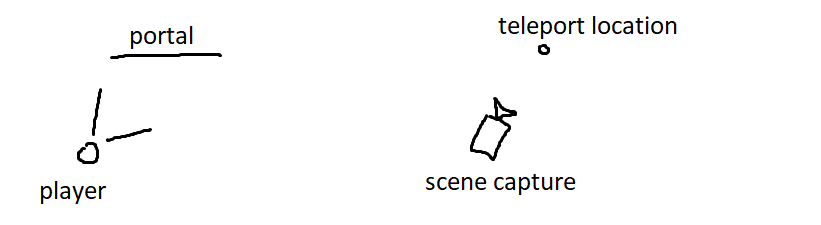
This will ensure that both scenes are always "in sync" and the effect looks flawless.
I'm kinda glossing over the teleport bit as I don't think it's as interesting as the rest soooooo....
There you have it 😁 Portals!
I don't actually plan to use them in the way Portal did (e.g. dynamically placing 2 portals in the levels to teleport to impossible locations and such), but more to create weird, almost non euclidian spaces / illusions and puzzles.
As last time, I hope somebody found this entertaining and informative (entertainative?).
Have a great rest of the week everyone!