Hello again IndieDB,
just wanted to shed some light on another little feature of my passion project, the terminal.
It serves both as a way to dish out objectives, and as a story telling device. See I love coming up with my own stories, but unfortunately I'm absolutely terrible at telling them.
So I thought, maybe instead of trying to "push" a story onto the players, I could let them "pull" the bits they're interested in, and this is where the terminal comes in.
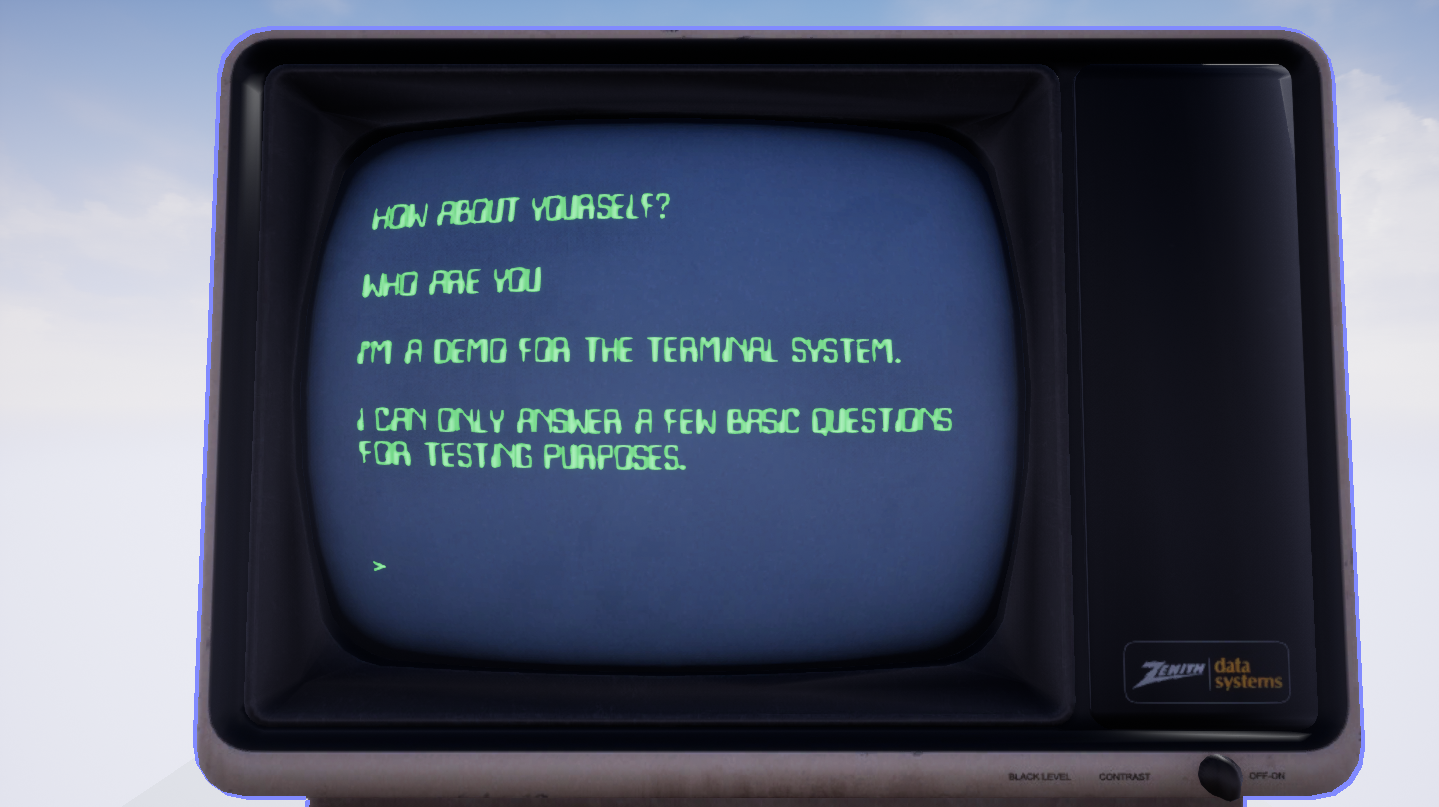
During the course of the game, you will get several chances to converse with a friendly character and ask them questions. It's not quite on the level of a chat bot - then again that's not the goal - but it can use keywords and filters to parse the player's input and try to find a matching response in its "dictionary".
I'm hoping I can eventually find some kind people willing to help me beta-test so I can find out what questions they ask, and include them in the game 😅
On the visual side, I wanted to use old tech in the game, so it was important that the text on the terminal match the curvature of the CRT screen.
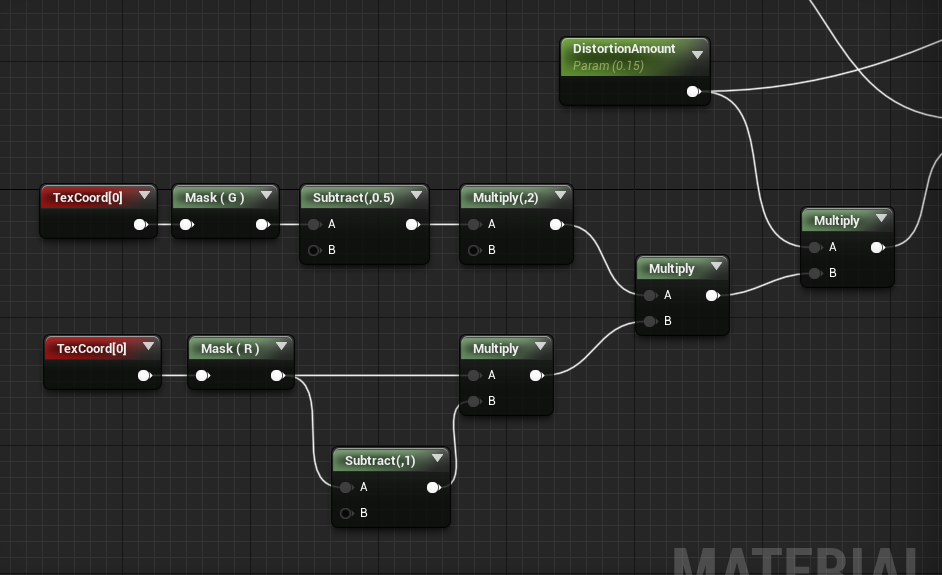
In order to achieve that I wrote a tiny material that warps the text based on the position of the pixel on the screen and a pre-determined "distortion amount".
The bit for the vertical displacement looks like this:
I'm not the best person at math, but when it comes to trying to understand what a calculation does, I always find it useful to plug in numbers, so I'm going to do just that 😄
I'll take the top line of the screen as an example. Texture coordinates go from 0 to 1, so our Y coordinate will always be 1 (top of the screen) and our X will go from 0 (left) to 1 (right).
This already simplifies things a little, as the top line will always give us the same result:
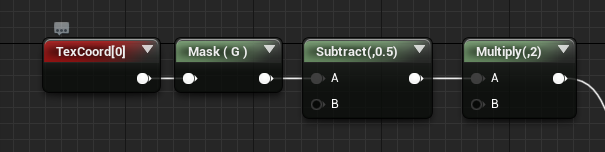
First I subtract 0.5, then multiply the result by 2. The reason for subtracting 0.5 is because I want the curvature to be centered around the center of the screen.
So instead of ranging from 0 (bottom of the screen) to 1 (top of the screen), our Y coordinate will - after also having been multiplied by 2 - range from -1 (bottom of the screen) to 1 (top of the screen), resulting in the text curving in opposite directions around the center of the screen.
For this example, this line will always give us (1 - 0.5) * 2 = 1 (how convenient 😅 this means we can ignore it as it will just multiply whatever we get by 1).
Looking at the bottom line, we get:
for X = 0 : 0 * (0 - 1) = 0, so at the very left of the screen we get no vertical displacement.
for X = 0.5 : 0.5 * (0.5 - 1) = -0.25 (which then gets multiplied by the "distortion amount", and added back to the original Y coord) so at the center of the screen, we get a negative displacement value.
for X = 1 : 1 * (1 - 1) = 0, so at the very right of the screen we are back to no vertical displacement.
And the result looks like this (of course you can tweak the effect by changing the "distortion amount"):
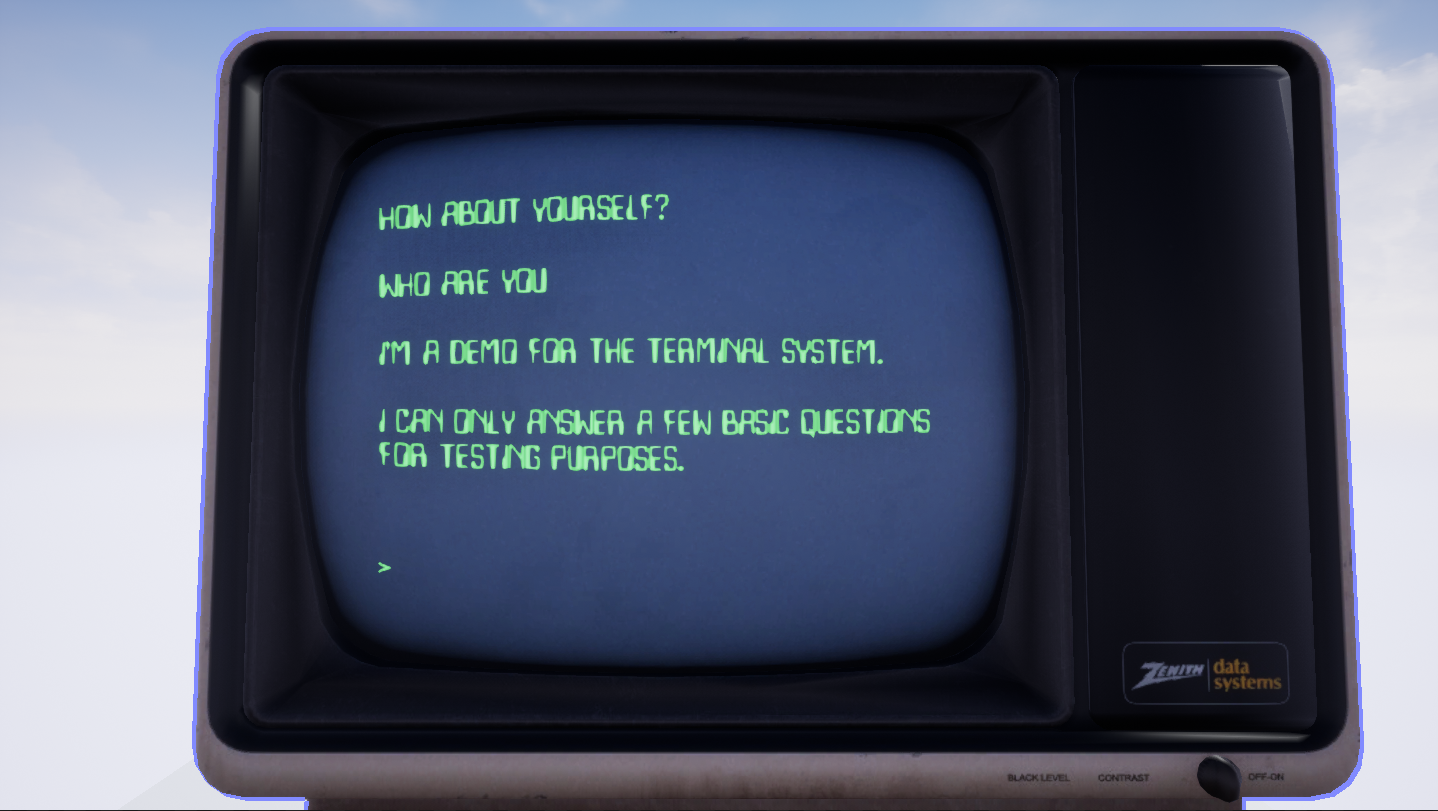
Now you might wonder how a negative displacement value at the center of the screen warps the text upwards rather than downwards, which would seem more intuitive, but thinking about how texture lookup works it actually makes sense.
The UVs are telling Unreal where to look into the original texture for the color of the current pixel we are drawing. In a normal situation this matches the coordinates of the current pixel 1 to 1.
However if you "trick" Unreal into thinking that we are still a line below where we actually are, it will look for the pixel information in the "wrong" line, thus stretching the line below us up to the current line.
It's easier to visualize than to explain with words, so I tried making a crude drawing (which to be honest will probably make things even more confusing 😅)
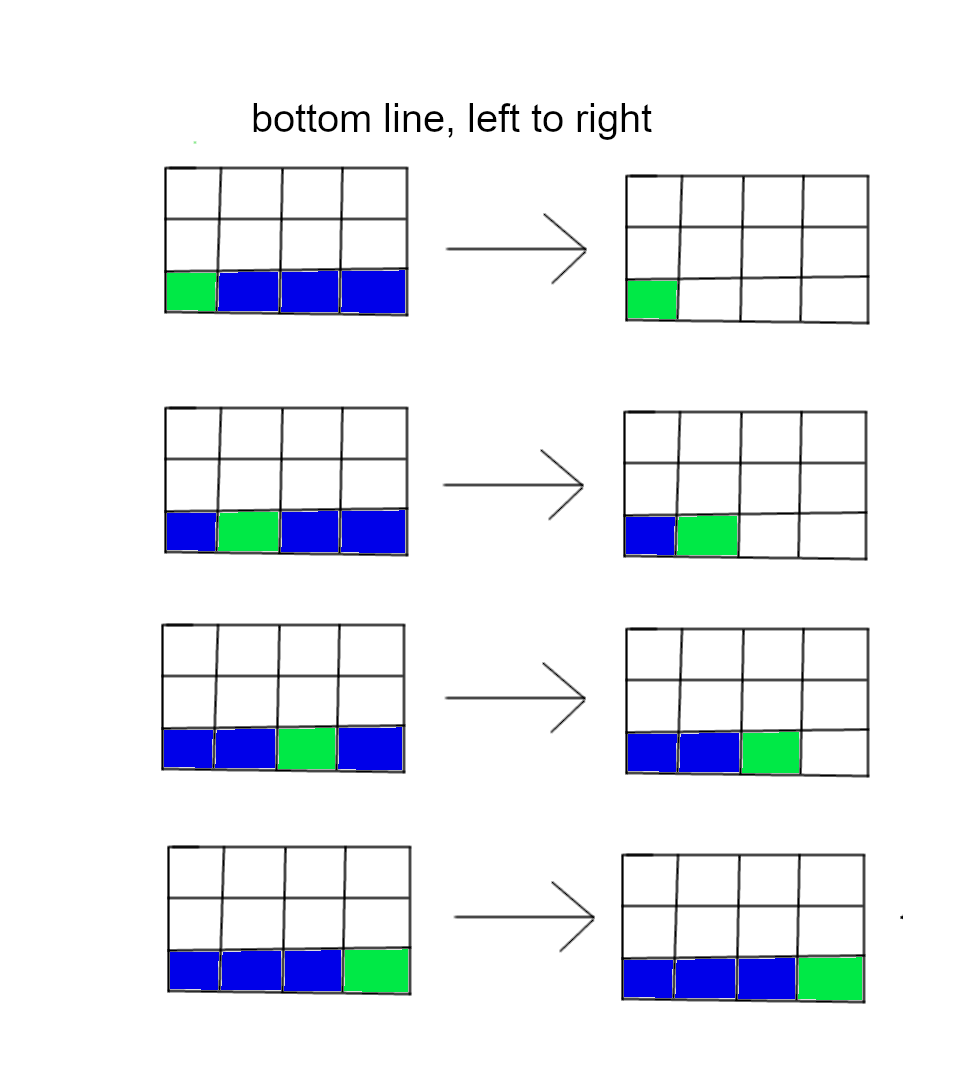
First let's do the bottom line with no displacement, copying the pixels from left to right, we obtain a horizontal line (the green pixel is the one we are copying):
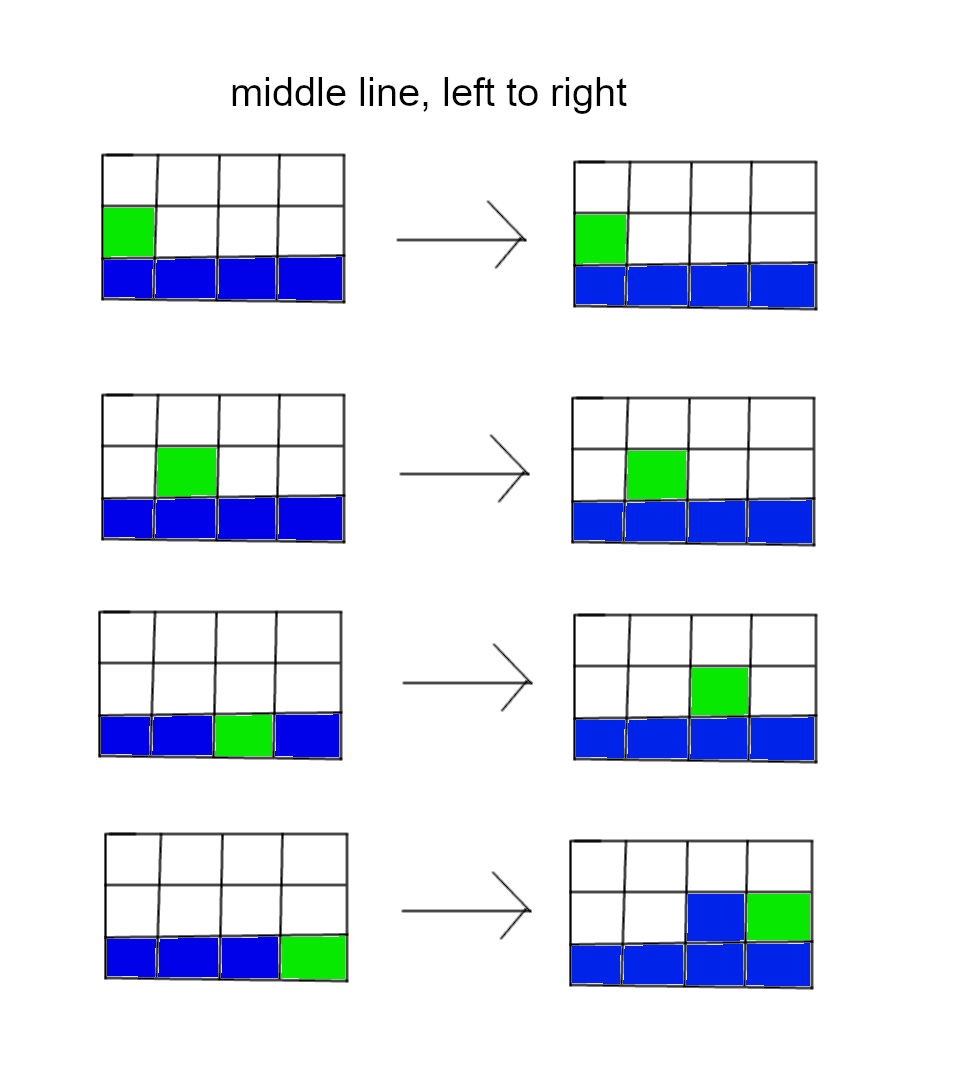
Now if we do the same, for the middle line, we should end up with a blank line, just like in the source texture on the left.
However if halfway through we tell the renderer to use the line below us, the result is that the line below us gets stretched up to the current line:
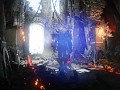
Apply this principle to the entire screen, both vertically and horizontally, and you end up with a cool looking old-timey CRT monitor:
And there you have it! I hope somebody found this at least mildly informative 😅 Next time I'll showcase my portals (nothing ground breaking, but they can make for really fun puzzles!).
Until then have a great week everyone!